Welcome to my first EVER Friday Favs! Every Friday I'll be sharing my top 5 favorite things that I'm currently crushing on. With 4th of July right around the corner, here are my favorite items that are must haves for this holiday.
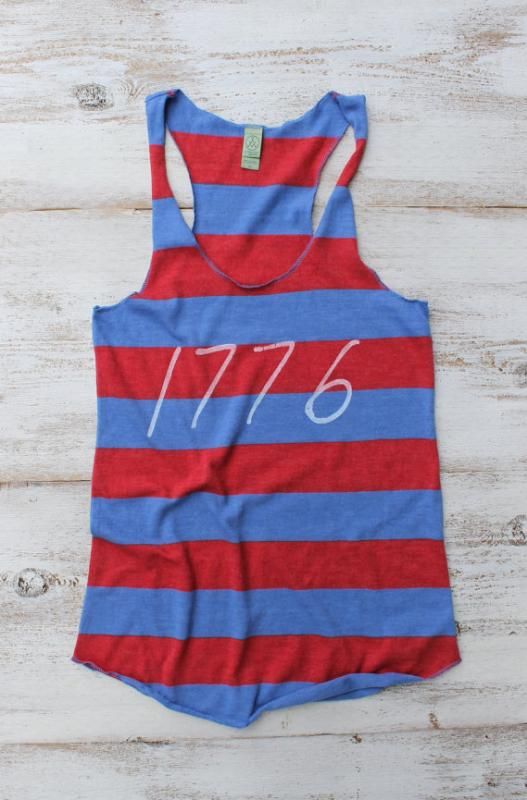
1. Riley Clay Designs // 1776 Tank
I ordered this from one of my favorite local businesses, Riley Clay Designs. She is out of Gainesvillle, Georgia and close to my hometown of Dahlonega. She has THE cutest screen printed shirts, and better yet, they also love Jesus! Check her out on her Etsy shop, Grey Thread or in in downtown Gainesville at the Corner Cottage.
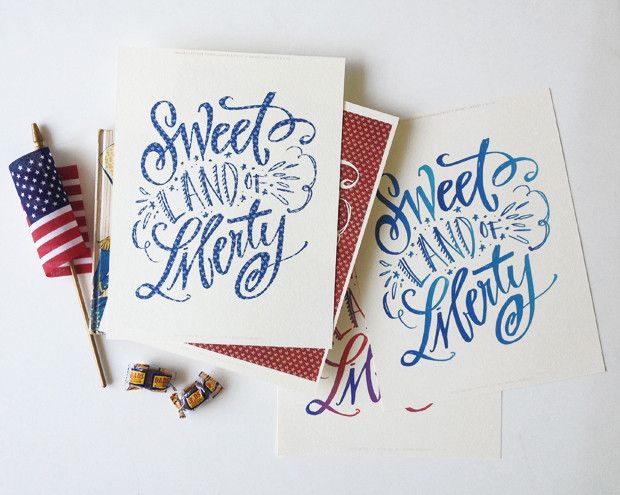
2. Lindsay Letters // Sweet Liberty Print
I LOVE Lindsay Letters. Her lettering has been featured on a couple of my favorite books, Bread & Wine, and The Nester. She is so talented! I'm not sure how I came across her, I think I stumbled upon her on Instagram and have loved watching her brand grow since. For $10, this print will definitely be on my 4th of July tablescape.
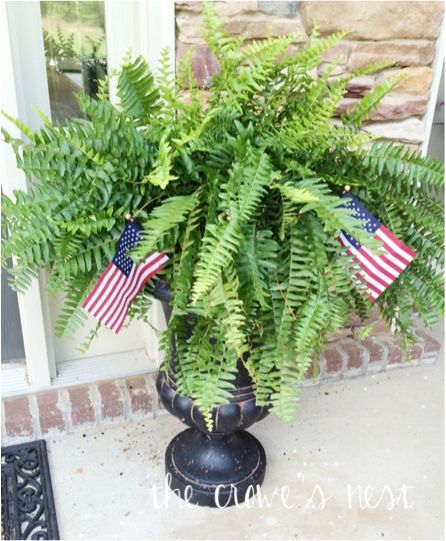
3. Ferns + American Flags
Recently, I changed out my boxwoods in my urns outside of my front door, for these two Kimberly Ferns. I love the fullness and texture they add as you enter our house. Adding two small American Flags to each helped bring some 4th of July spirit without being too obnoxious. Love is in all the little details :)
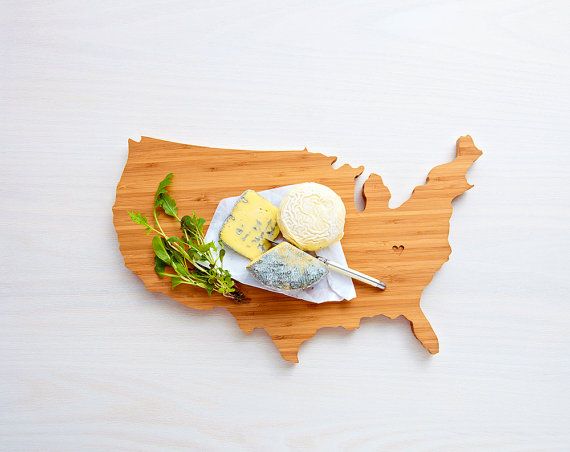
4. A Heirloom // USA cutting board
I recently bought one of these awesome cutting boards for a friend for one of her wedding showers. A Heirloom, on Etsy, has different state cutting boards made with butcher block plywood. You can even personalize these with someone's intials, important dates, a heart, or a star, over your desired city. This gift was such a hit! So, when One Kings Lane recently had a deal featuring A Heirloom, I acted quick. I ordered this USA cutting board and can't wait to use it for hors d'oeuvres on the 4th of July! I also think it would be cute to keep out on the counter as part of your decor, even if it's not the 4th of July. There's always a reason to celebrate this great country we live in. #merica
5. Freshly Picked // Born in the USA Mocs
I fell in love with Freshly Picked when I first saw them on Shark Tank on ABC. I love when people are given the opportunity to chase their dreams and start up their own company. There is no company I would rather support than one that is started here in America. After all, we are the land of opportunity. Freshly Picked makes the cutest baby mocs! Even though we do not have any kids {yet}, I could totally see myself giving these as a gift to one of our nieces or nephews. I mean, do these come in adult sizes? Because I would totally wear them.
More DIY projects to come next week so keep checking back :)
Friday, June 27, 2014
Wednesday, June 25, 2014
Striped Curtains
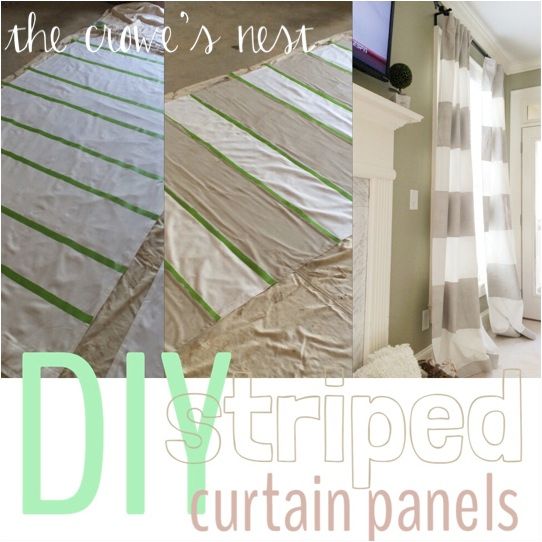
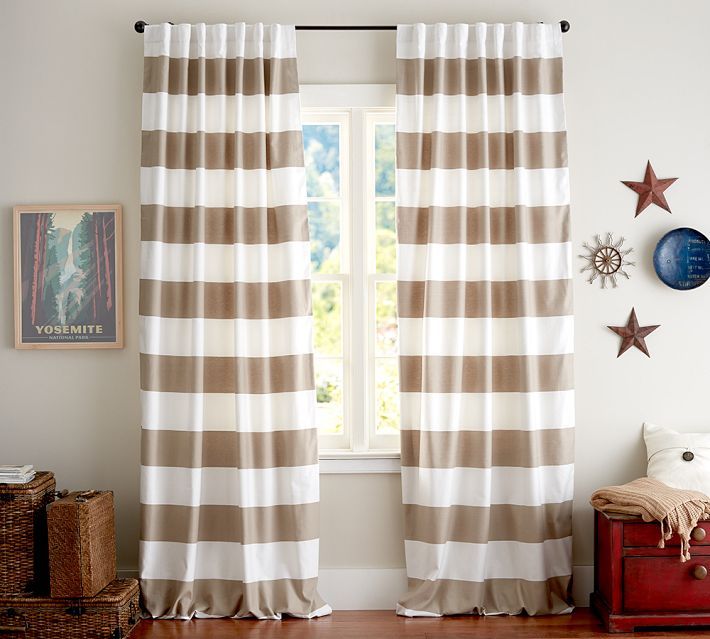
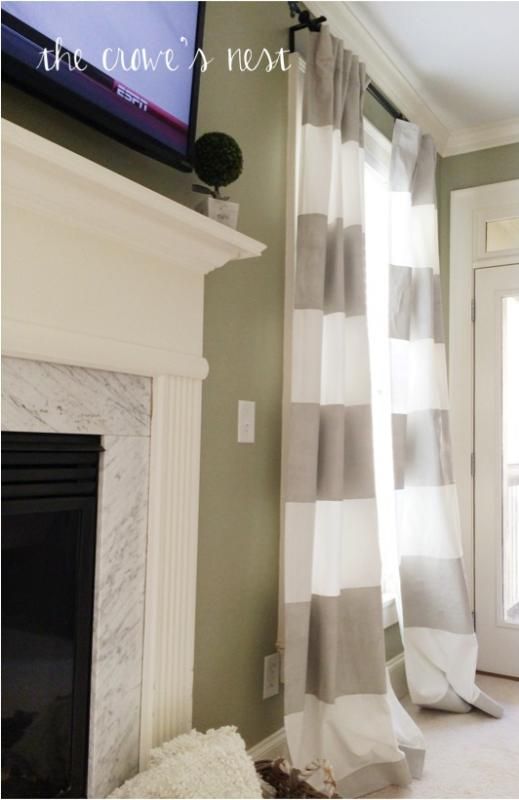
I posted on Instagram not too long ago, an Ikea hack on white curtains inspired by Honey We're Home and Dear Lillie. Two of my favorite blogs! Previously, in our living room, we had plain white linen-ish curtains. I bought these because, if you couldn't tell, I love WHITE. I love the clean and fresh feel that white curtains, cabinets and furniture can bring to a room. I hate for things to feel dark when you walk into a space. Definitely a trait I have gotten from my mother. After a short time of having these curtains though, I grew bored with the plain sterility of these. There needed to be more interest. After researching (of course on Pinterest) I came across ways to add extra interest. I'm not going to lie, was very hesitant at first to take down my perfectly fine Ikea RITVA curtains and paint them. My biggest fear was that the paint would bleed and they would be ruined. But, after all, these are Ikea curtains. It wouldn't take that much to replace them and, if they paint did not bleed, I would have achieved the look I wanted for a fraction of the cost. Here are some higher end striped curtain looks that I was inspired by. These are from Pottery Barn.
So, I was sold. 1 gallon of satin paint from Sherwin Williams, 1 1/2 inch frog tape, a small roller, and drop cloth were all I needed. I liked the color that Dear Lillie had used on her curtains. I decided to copy her and use London Fog by Benjamin Moore. It's the perfect greige. Our wall color is Svelte Sage by Sherwin Williams from their Pottery Barn Collection. My mom used this color in their living room, and I love the coziness that it brings. I felt that London Fog also complimented this. Also, In the HWH blog, she used a textile medium to mix into her paint before painting the fabric curtains. I did not do this, since I was painting darker stripes onto white curtains. I was not concerned with the paint cracking because I did not anticipate having to do more than three coats. If you are painting dark curtains lighter, like she did, I would recommend using this.
Getting Started:
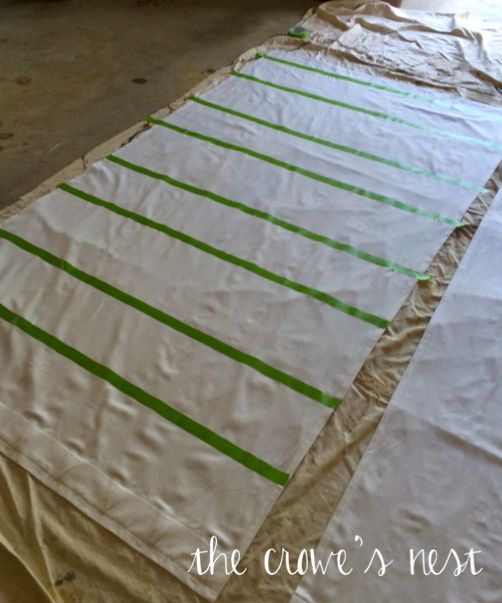
I took my curtains down, and washed them and had them pressed at the local dry cleaner before painting them. I wasn't sure on how I would clean them after paint being applied and wanted to make sure that they were clean beforehand. I did a total of 4 panels for the two windows we have in our living room. I laid out a drop cloth in the garage and made sure that each panel was as flat as possible before starting to tape.
With a measuring tape, I marked every 12 inches with a pencil on BOTH sides of each panel. After ALL of the marks were made on both sides, I taped from one end to the other making sure that the tape was straight. This was the most time consuming part. You definitely don't want uneven stripes. I recommend only using Frog Tape to do this. I have had so much success with this brand. From painting walls and everything in between, it can keep lines straight and prevent any bleeding. **Also, very important when painting stripes, the stripe that you are painting needs to be marked correctly with tape. When making your pencil marks, tape on the outside of that line for stripe you are painting and on the inside of mark for stripe being left white. That way, when you remove your tape, all stripes are the same size.**
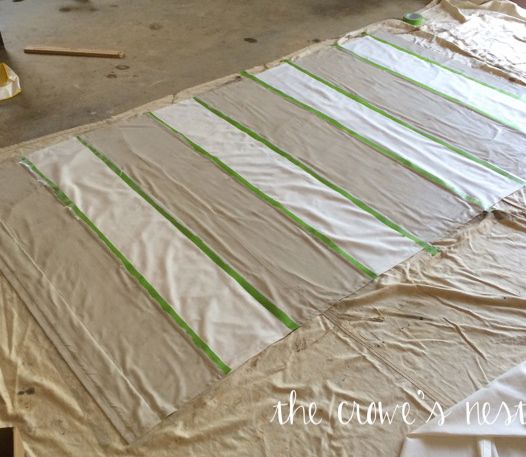
Once all of my panels were marked, and taped, I began painting. It was hard to tell how many coats I would need at first, because the paint does soak into panels. I ended up only having to do two coats, initially. Once curtains were hung, I had to take a small paint brush and touch up areas that were not as saturated with paint.
I let these dry for a few hours, and intermittently, very carefully, tried to lift them up from the drop cloth below them to make sure they didn't stick. They definitely will adhere to the drop cloth if you don't try to lift them up once they're somewhat dry. After they were dry, I hung them back up and used a small paintbrush to touch up any spots that were missed. All in all, I think they turned out great! I'm not sure that these will stay in our living room, I am debating moving them to one of our guest rooms. But, regardless, they bring so much happy to any room they're in!
Feel free to pin + share! Thanks for visiting.
Labels:
benjamin moore
,
cottage stripe
,
curtain
,
diy
,
frog tape
,
ikea hack
,
Ikea ritva
,
living room
,
london fog
,
ritva
,
striped curtain
,
svelte sage
Sunday, June 22, 2014
Thrifty Chair Makeover
For my very first DIY post, I'll keep it simple :) Lately, I feel like
chairs have been coming out of thin air to me for a makeover. My
father-in-law manages a local country club, and they were selling all of
their dining chairs for $15.00 a piece. I snagged four of them (thanks to my amazing Mother-In-Law) and made
two into chairs that we use in our living room, and the other two, we
took the arms off of and used around our dining room table. I am a huge
believer that things don't have to be expensive to be beautiful and functional.
Sometimes I get frustrated while shopping at large chains for home decor.
Don't get me wrong, I LOVE Home Goods, as well as Pottery Barn and Restoration Hardware. But, sometimes the Pottery Barn
dining chair just isn't in the budget. Thrift stores, goodwill, and
antique stores can give you furniture for much cheaper, and to me, those
pieces are the ones that have the most character. The labor that you
might have to put in to turn them into what you want can be tedious
sometimes, but in my opinion, it's worth it.
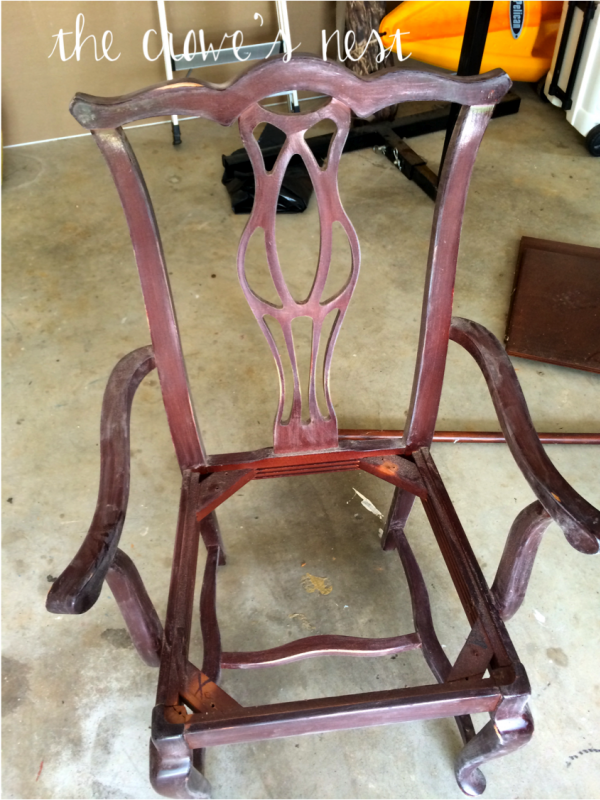
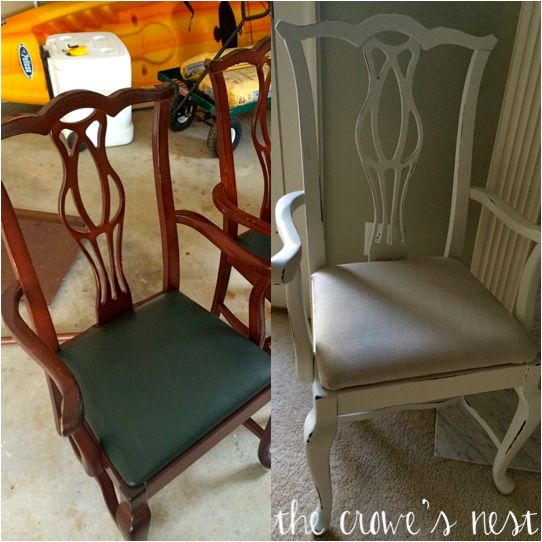
Here are the chairs before their thrifty makeover. For some of you this might be your style, but for me, I thought they needed a nice coat of white paint and a change to those pleather seat cushions.
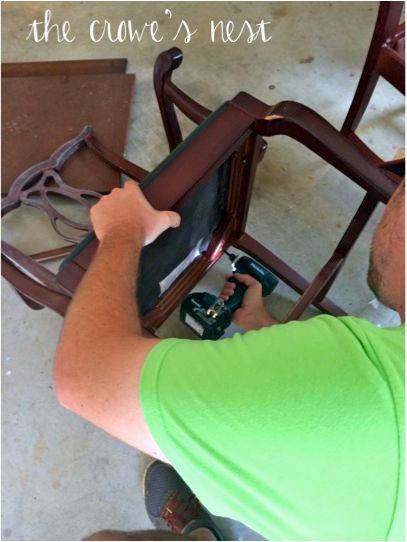
First step was to have my handy-dandy husband unscrew the seat cushions from the chair so that I could sand them and a prepare them for paint.
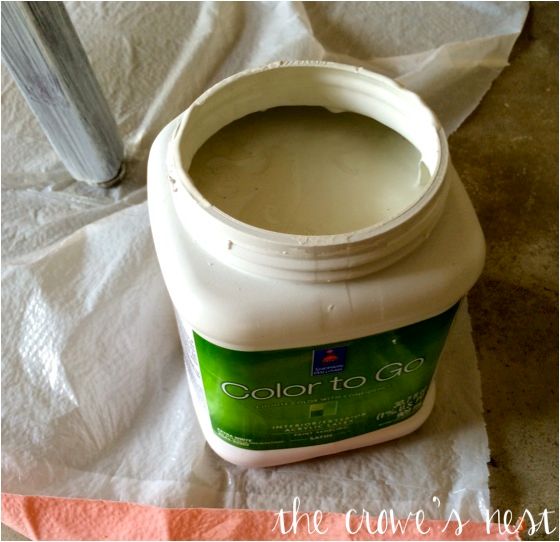
Typically, for a furniture project like this, I would use chalk paint. I've worked with it quite a few times, and the coverage and easy ability to sand are unlike any other medium I've ever worked with. But, in order to keep the cost low on these, I mixed a few white and off-white paint samples that I had left over from picking out trim colors for our house.
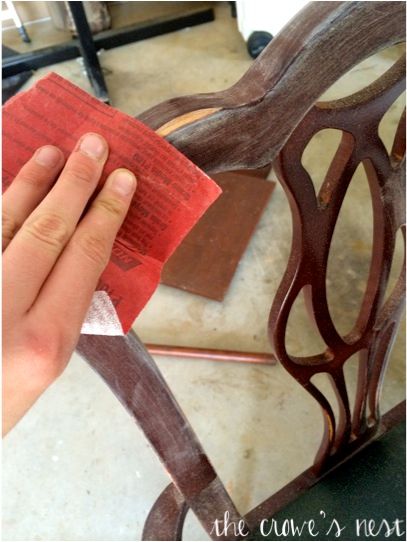
After Evan unscrewed the cushions for me, I did a quick sand with 100 grit sand paper, just to "rough up" the wood. These chairs previously had a heavy coat of poly of them. In my opinion, I don't always find it necessary to completely sand the pieces of furniture down before painting. As long as the surface is somewhat rough, your paint will stay just fine.
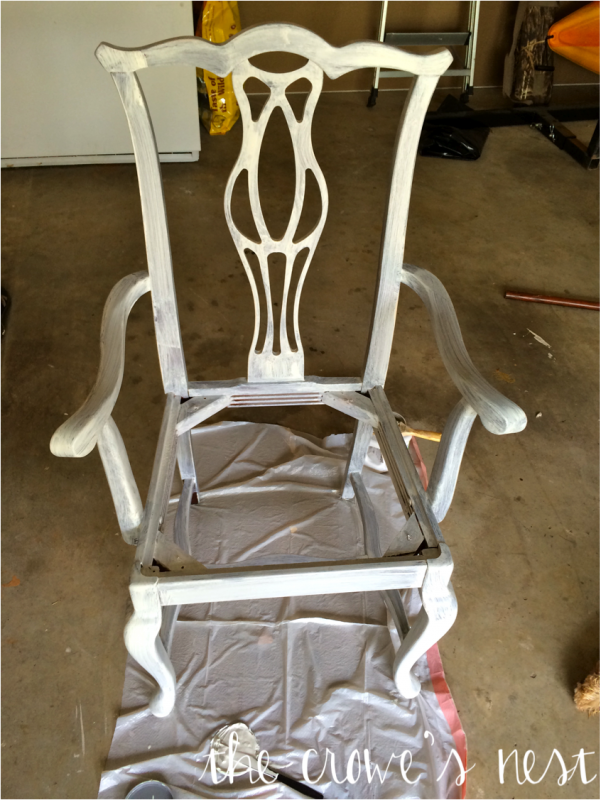
Then, I started painting. I used a paintbrush on these instead of a small roller. It did take about three coats to get the coverage that I needed. This picture was taken after one coat. Depending on the color you use, or the amount of character you want your chair to have, you may not need three coats.
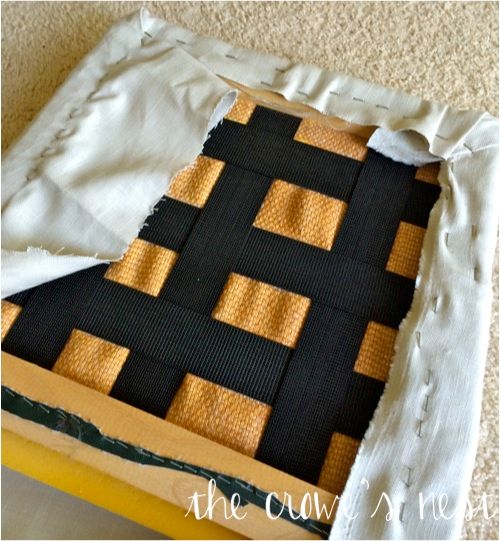
In the meantime while my paint was drying, I got to work on the cushions. For some reason, this was the part I was most excited about. I used left over fabric that I had from getting a chair recovered and a mudroom cushion made from Fabric and Fringe. It was a nice gray-ish linen that matches with the colors throughout our house. I first used a razor to cut around the staples from the previous cushion, so that it could be easily removed. Then, I laid and cut my fabric, and made sure that with each staple, the fabric was VERY tight. You want to make sure that you are pulling your fabric tight as you're stapling to reduce the risk of wrinkles. After you're done stapling, cut away the excess fabric.
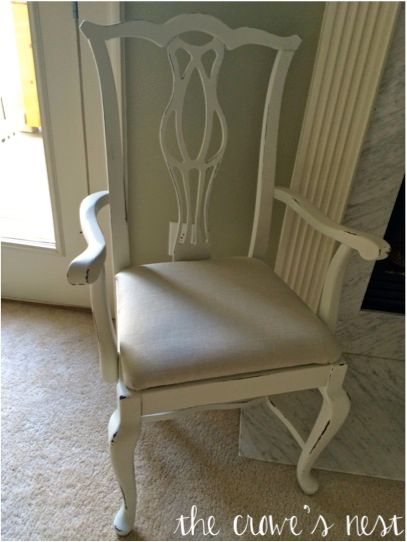
Once my chairs had dried after the three coats, I then took more sandpaper to "rough" them up a little. I love the antique look of chairs, and wanted these to look distressed. It also helps if you had any drips or imperfections while painting, you can just sand away those areas to give more it character. After the second sanding, we reattached the cushions, and TA-DA!
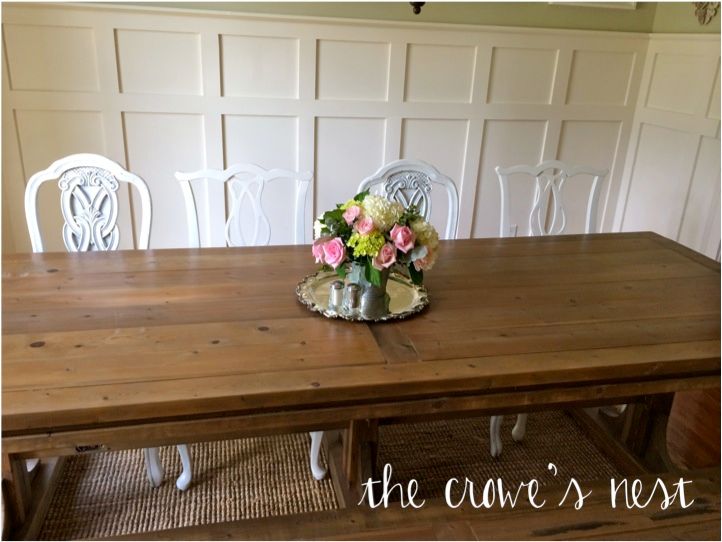
These two chairs, we have in our living room in front of the fireplace. For the other two, I refinished the same way, except we removed the arms first so that they could sit at our dining room table. The chairs around our table are mismatched, but I love them that way. The other two chairs I bought from A Classy Flea in Marietta, $45 for the set. So, in total, my dining room chairs cost under $80 for the four of them. Not pictured, on the other side is a bench my husband built for additional seating. More to come on our dining room table and bench, as well as the board and batten tutorial.
Here are the chairs before their thrifty makeover. For some of you this might be your style, but for me, I thought they needed a nice coat of white paint and a change to those pleather seat cushions.
First step was to have my handy-dandy husband unscrew the seat cushions from the chair so that I could sand them and a prepare them for paint.
Typically, for a furniture project like this, I would use chalk paint. I've worked with it quite a few times, and the coverage and easy ability to sand are unlike any other medium I've ever worked with. But, in order to keep the cost low on these, I mixed a few white and off-white paint samples that I had left over from picking out trim colors for our house.
Then, I started painting. I used a paintbrush on these instead of a small roller. It did take about three coats to get the coverage that I needed. This picture was taken after one coat. Depending on the color you use, or the amount of character you want your chair to have, you may not need three coats.
In the meantime while my paint was drying, I got to work on the cushions. For some reason, this was the part I was most excited about. I used left over fabric that I had from getting a chair recovered and a mudroom cushion made from Fabric and Fringe. It was a nice gray-ish linen that matches with the colors throughout our house. I first used a razor to cut around the staples from the previous cushion, so that it could be easily removed. Then, I laid and cut my fabric, and made sure that with each staple, the fabric was VERY tight. You want to make sure that you are pulling your fabric tight as you're stapling to reduce the risk of wrinkles. After you're done stapling, cut away the excess fabric.
Once my chairs had dried after the three coats, I then took more sandpaper to "rough" them up a little. I love the antique look of chairs, and wanted these to look distressed. It also helps if you had any drips or imperfections while painting, you can just sand away those areas to give more it character. After the second sanding, we reattached the cushions, and TA-DA!
Saturday, June 21, 2014
Meet Ellany
Hey y'all and welcome! My name is Ellany, I'm a 25 year old who recently (one year ago) got married, and purchased a home with my amazing husband, Evan. We were fortunate enough to find a house that exceeded our expectations and was within our budget, because it was a foreclosure. Immediately after closing, I had HUGE dreams about the potential of this house. Right away, with eagerness, we got to work on the first project, and it has truly been a never-ending to-do list since. In the past year, I have found my niche in decorating, and it has become a true passion of mine. I can't say that I am surprised, given my roots.
Growing up in my family, both of my parents were constantly working around the house. My dad, being the ultimate handy man (some of my friends call him MacGyver), and my mom, having this innate sense for decorating, were the ultimate dynamic duo. They had vision and plans for our homes that I could not believe at the time. I can remember our first home, in Stone Mountain, Georgia. It was so run-down (to put it nicely) that my mom and dad completely gutted and renovated, making it into a quaint little bungalow. That house was the stepping stone to the next house, which they completely gutted and made into a beautiful farmhouse in Grayson, Georgia. This continued to their home in Dahlonega, Georgia, a little mountain town. My sister, Brittny, and I were constantly around a DIY project, paint cans, nail guns, anything that could turn these "fixer-uppers" into something beautiful. It was our normal. So, when Evan and I were looking for a home, I grew to be able to see the potential in the spaces we were looking at. Keep in mind, many people would be completely happy with our house the way that it was when we bought it- and I am. I am so thankful that we were given the opportunity to live in such a quiet, and cute community. But, I believe it is in my genes to want to change and personalize a few things along the way. Luckily, my husband reminds me a lot of my dad, and helps make my ideas to come to life. He has surprised me so much this past year with all of his craftsmanship and talent.
My plan for this blog is to give each of you inspiration and DIY tips + tricks to make your house into a home, too. It will also serve as a way to keep track of our progress in our house and to document our projects. Here and there, you may get to see a few pictures of our family and a really cute golden doodle named, Jack. He is our love! My plan is to post whatever inspires me, and to link-up with other blogs that I look at often. Thank you for your interest and to all of you that encouraged me to start this!
With all of that being said, I want to quote one of my favorite blogger's and authors, Myquillin Smith, author of The Nesting Place and The Nester Blog.
"We don't want a pretty home just for the sake of a pretty home. Home is a place to come to for rest. It's also a place to go out from to do everything else we're meant to do. I long to create a home where all who enter can fully be themselves, and where all who leave can be more ready to live out their calling. After all, creating a beautiful home is a journey, not a destination. It is a privilege to live with beauty and creativity that inspire us so that we can inspire others to create in their unique ways. So go, make your home a place of rest, and joy, and nurturing. It is from home that we become all we were created to be."
